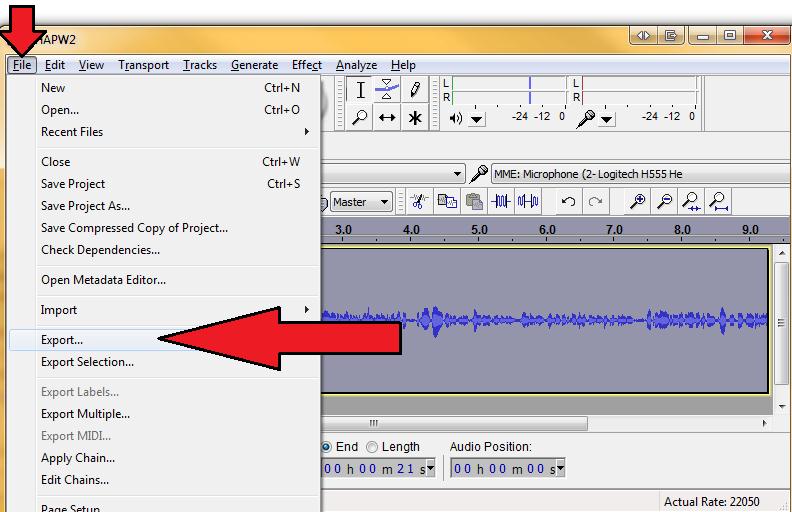
Configuring IIS to use a Gmail SMTP relay server
Under “Access” > “Authentication” check Anonymous, leave basic and windows unchecked.
“Access” > “Connection” check “All except the list below” leave it blank.
“Access” > “Relay Restrictions” same, check “Only the list below” and also check “Allow all computers which successfully authenticate to relay, regardless of list above.”
Match message size limits/etc. to below image (or adjust per environment.)
Also match Delivery settings to below (or adjust per environment.)
For “Outbound Security” select Basic Auth + TLS encryption. Account must be provided by customer.

Set “Outbound Connections” to the listed settings or adjust per environment as necessary.
Lastly be sure the fully-qualified domain name is used. If using an IP address here things can get dicey. Set smart host to smtp.gmail.com andUNCHECK the “Attempt direct delivery before sending to smart host.”